Wednesday, February 16, 2011

Oracle Java Standard Edition (SE) 6 Update 24 Released

As of February 15, 2011, the current version of the Oracle Java client is Java(TM) 6 Update 24.

Action Required:
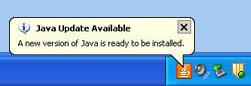
If you see the Java Update icon or "Java Update Available" balloon in the lower right corner of the screen, the latest version of Java should be ready to install. You can click the icon and follow its prompts to apply the update.

Note: We recommend that you do not install any offered "extras" like Carbonite Backup, Microsoft's Bing Toolbar, MSN Toolbar, or OpenOffice.org Installer. Please un-check these options if they appear.

Or, our How To Update Sun's Java Software has complete steps on how to install Java from either the "Java Update Available" message or how to download and install Java manually .

Fixed:
Java SE 6 Update 24 contains a fix for a security vulnerability that allowed an attacker to cause "a complete denial of service" on your computer. If a Java application attempted tp convert "2.2250738585072012e-308" into a floating point number in Java, the bug caused an endless loop that resulted in a 100% load on your computer's processor.
The full list of changes may be found here: http://www.oracle.com/technetwork/java/javase/6u24releasenotes-307697.html

Note:
Java is a programming language and computing platform first released by Sun Microsystems in 1995. Java Standard Edition or Java SE is used by your computer to run certain web based applications. These may include web based training applications.
http://www.java.com/en/about/

Wednesday, February 09, 2011

Adobe Releases Multiple Security Updates

Adobe shipped critical security updates to its Adobe products on February 8, 2011. Products affected are Adobe Reader and Adobe Acrobat as well as Adobe Flash Player.

Adobe addressed vulnerabilities in these products that that could cause the application to crash and allow an attacker to take control of the affected system.

Action Required: Ag IT recommends that College of Ag Science faculty and staff update any Adobe products to the current version.

Adobe Reader and Adobe Acrobat
  1. To update Adobe Reader 9 to the current version, follow our How To Install and Configure Adobe Reader v9 for Windows.

  2. If your computer has Adobe Acrobat Professional v9 or vX installed, you should be able to use the built-in Updater program to update the software.
    a) From the Help menu choose Check for Updates.
    b) If updates were found, follow the on-screen steps to update.

    Note: If an update is downloaded, close Adobe before applying the update. Then re-open Adobe. Repeat steps a - b until no more updates are available.

    Note: If the automatic updater does not find the latest updates, and your version is not the most current one, go to the Acrobat for Windows downloads page. Scroll down to locate the update for your version. Download and install.

    Note: Along with applying this update, we also recommend that you follow these steps to Secure Adobe Reader to Prevent Malware once you have your Adobe products updated!!

    Note: Earlier versions of Adobe Acrobat Professional (version 8 or lower) will not receive this patch. This updates represent an out-of-cycle release.

Adobe Flash Player

  1. To update Adobe Flash Player to the current version, follow our How To Install Updates to Adobe Flash Player, http://agsci.psu.edu/it/how-to/install-updates-to-adobe-flash-player.

    Note: If you use multiple browsers, perform the check for each browser you have installed on your computer.
The Adobe Security bulletins and advisories page, http://www.adobe.com/support/security, has additional information and links on these updates.

Monday, February 07, 2011

USB drive becomes 'PENDRIVE' - Remove AUTORUN.INF virus

Ag IT Support has received several reports of College staff with Dell Enterprise machines with Windows XP becoming infected with an AUTORUN.INF virus recently.

Computers have become infected via the use of USB drives at conferences in particular. If your USB is placed into an infected machine, the drive name will be listed as PENDRIVE. If you place this drive into another Windows machine, the virus will be implanted there, ready to infect the next USB drive attached to the computer. This will continue to spread the virus via other USB drives to other computers.

NOTE: You should not insert an infected USB drive (e.g. memory stick) into any other computers until the virus is cleaned.

Malwarebytes' Anti-Malware can detect and remove most Malware with no further actions required for free. You should install it first to be sure you can scan and double check for the AUTORUN.INF virus.

Download Malwarebytes' Anti-Malware
  1. Go to this link, click the Download Latest Version. Save the file to your desktop.

    http://www.filehippo.com/download_malwarebytes_anti_malware/

  2. Double-click on the mbam-setup.exe (where the x represent numbers) to install the application.

  3. When the installation begins, follow the prompts and do not make any changes to default settings.

  4. When installation has finished, make sure you leave the first choice checked but un-check the 2nd.

    [check] Update Malwarebytes' Anti-Malware
    [uncheck] Launch Malwarebytes' Anti-Malware

  5. Click Finish. Wait for the program to update. Click OK.

Block the AUTORUN.INF virus

These steps will tell Windows to not execute the information in any AUTORUN.INF file that may be present. This is a great method to prevent Windows from being infected by virus through autorun.inf method. The only downside of this is that if you insert a USB Drive, CD or DVD with software on it, you have to open it by manually.
  1. Click Start, choose All Programs, and open Notepad.
  2. Copy the text below and paste it into the blank Notepad window.

    REGEDIT4
    [HKEY_LOCAL_MACHINE\SOFTWARE\Microsoft\Windows NT\CurrentVersion\IniFileMapping\Autorun.inf]
    @="@SYS:DoesNotExist"

  3. Save the file with this name to the desktop (be sure the extension is .reg and not .txt):

    NoAutoRun.REG

  4. Close Notepad.
  5. Double click on NoAutoRun.REG and click Yes if you're asked "Are you sure you want to add the information in C:\NoAutoRun.reg to the registry?"
Clean the AUTORUN.INF virus
  1. Insert the USB drive.
  2. Open My Computer. Make a note of the Drive Letter assigned to the USB drive (for example Drive letter E).
  3. Click Start, choose Run.
  4. Type cmd into the Open box. Press Enter.

    Note: This will open a command prompt window. Within the command prompt window type the following text in bold and then press Enter.

  5. Type cd\ and press Enter.

    Note: In step 5, you will type the drive letter

  6. Type the drive letter followed by a colon (for example E: or F:). Press Enter.

    Note: In step 7 there is no space between the dashes and the letters but there is a space after the letters.

  7. Type attrib -r -h -s autorun.inf and press Enter.

  8. Type del autorun.inf and press Enter.

    Note: If you see a "file not found" message, double check the spelling for Step 8. You may repeat. But the file may not be present on the drive (so it is not infected).

  9. If you have a second USB drive, insert and repeat steps 1 through 8.

  10. Final Step: Open Malwarebytes, choose to do a Full Scan. Scan both the C drive and the USB drive (s). If anything is found, click Show Results. Remove any infections.